Building your own gaming PC can be a rewarding and cost-effective way to get a machine tailored to your needs. Here’s a step-by-step guide to help you through the process:
1. Plan Your Build
Determine Your Budget: Decide how much you’re willing to spend. This will guide your choices for components and ensure you get the best performance for your money.
Define Your Needs: Consider what you’ll use the PC for—gaming, streaming, video editing, etc. This will influence your choice of components.
2. Gather Your Components
Processor (CPU): The CPU is the heart of your PC. For gaming, a high-performance processor from Intel or AMD is ideal.
Graphics Card (GPU): The GPU handles rendering and is crucial for gaming performance. Look for models from NVIDIA or AMD that match your budget and gaming needs.
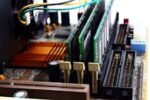
Motherboard: Choose a motherboard compatible with your CPU and other components. Check for features like expansion slots and connectivity options.
Memory (RAM): 16GB of RAM is a good starting point for gaming. Ensure your motherboard supports the type and speed of RAM you choose.
Storage: Opt for an SSD for faster load times and a larger HDD for additional storage if needed.
Power Supply Unit (PSU): A reliable PSU is essential. Ensure it has enough wattage to power all your components and choose one from a reputable brand.
Case: The case houses your components and affects airflow and cooling. Choose one that fits your motherboard size and has good ventilation.
Cooling: Depending on your CPU and GPU, you might need additional cooling solutions, like case fans or aftermarket CPU coolers.
Operating System: Decide on an OS, usually Windows for gaming, and get a license.
3. Assemble Your PC
Prepare Your Workspace: Set up a clean, static-free workspace. Keep your components organized and have the necessary tools ready.
Install the CPU: Gently place the CPU into the motherboard socket. Lock it in place according to the motherboard’s instructions.
Apply Thermal Paste: If your CPU cooler doesn’t come with pre-applied thermal paste, apply a small amount to the CPU before attaching the cooler.
Install the RAM: Insert the RAM sticks into the appropriate slots on the motherboard. Press down until they click into place.
Install the Motherboard: Place the motherboard into the case and secure it with screws. Connect the power cables and any other necessary cables.
Install the GPU: Insert the graphics card into the PCIe slot on the motherboard. Secure it to the case with screws and connect any necessary power cables.
Install Storage Drives: Mount your SSD and HDD in their respective slots or brackets and connect them to the motherboard and PSU.
Connect the PSU: Connect the power cables from the PSU to the motherboard, GPU, and storage drives.
Add Cooling: Install any additional case fans or CPU coolers as needed. Ensure proper airflow within the case.
4. Test and Install the OS
Power On: Turn on the PC and enter the BIOS to check if all components are recognized and functioning correctly.
Install the OS: Insert your OS installation media (e.g., USB drive) and follow the prompts to install the operating system.
Update Drivers: After installing the OS, download and install the latest drivers for your GPU, motherboard, and other components.
Install Essential Software: Set up any additional software you need, such as game clients and performance monitoring tools.
5. Optimize and Enjoy
Configure Settings: Adjust BIOS settings and in-game graphics settings to match your preferences and ensure optimal performance.
Monitor Performance: Use software tools to monitor temperatures and performance. Ensure your system is running smoothly and make adjustments as needed.
Enjoy Your New Gaming PC: With everything set up, you’re ready to dive into your favorite games and enjoy a high-performance gaming experience!
Building your own gaming PC can be a fun and educational experience. By carefully selecting components and following these steps, you can create a custom machine that meets your gaming needs and provides a solid foundation for future upgrades.